

Yoga poses lying on stomach—classified in traditional Sanskrit as Vipareet Shayan Sthiti or prone asanas—form the foundational back-strengthening curriculum in classical Hatha yoga. Unlike standing postures that compress the intervertebral discs under gravitational load or seated forward folds that stretch posterior ligaments, belly-down postures recruit your erector spinae, multifidus, and gluteal muscles to lift your torso against earth’s gravity.
At Aatm Yogashala in Rishikesh, we teach prone postures as the primary physical antidote to modern sedentary habits. Prolonged desk sitting forces your lumbar spine into persistent flexion while shortening your psoas and rectus abdominis. By placing your pelvis and abdominal wall directly on the mat, prone asanas stabilize your sacroiliac joints, restore the natural lordotic curve of your lumbar vertebrae, and expand restricted intercostal rib cage capacity.
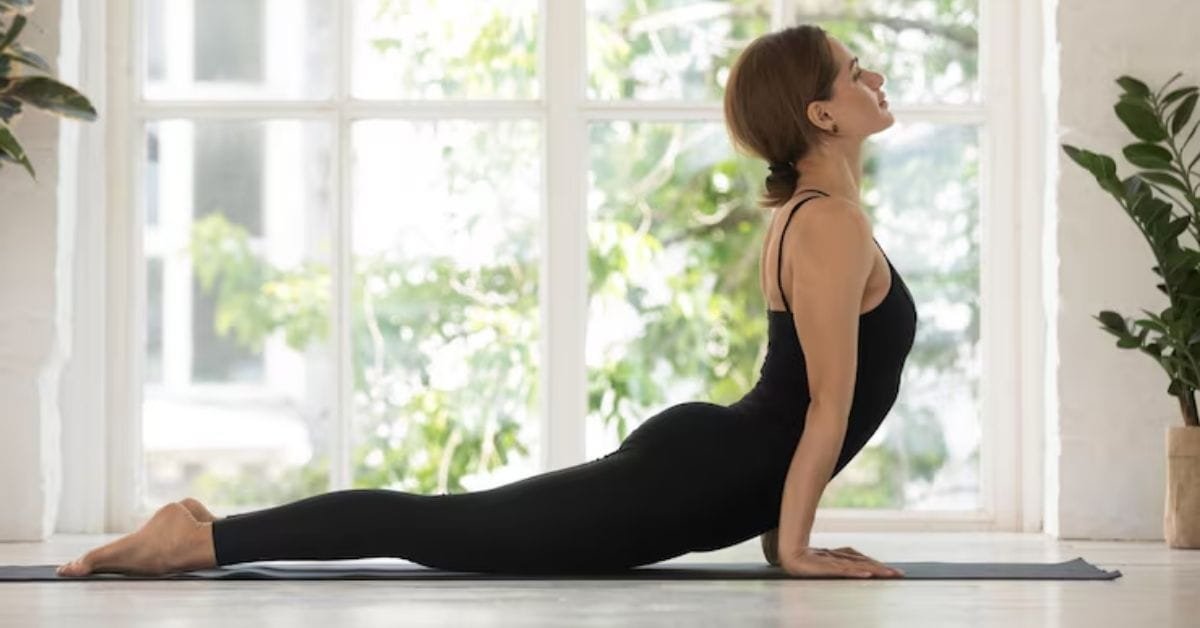
What Are Prone Asanas in Traditional Yogic Anatomy?
In traditional yogic methodology, postures performed face down on the floor are known as prone asanas (Adho Mukha or Vipareet Shayan postures). When your body rests on the ventral surface, your abdominal breathing creates rhythmic intra-abdominal pressure against the floor. This contact acts as an internal visceral massage for the liver, kidneys, pancreas, and ascending and descending colon, enhancing digestive blood circulation (Jatharagni).
From an orthopedic perspective, lying prone unloads the gravitational stress experienced during standing (~100 kg of compressive load on lumbar discs) and unsupported sitting (~140 kg). Grounding the anterior superior iliac spines (pelvic bones) into the mat prevents compensatory pelvis twisting, allowing your spinal extensors to engage symmetrically.
Key Biomechanical Advantages of Lying on Your Stomach:
- Posterior Chain Activation: Systematically strengthens the iliocostalis, longissimus, spinalis, and latissimus dorsi.
- Anterior Wall Lengthening: Gently stretches shortened hip flexors (iliopsoas) and rectus abdominis fibers.
- Ventral Visceral Stimulation: Floor contact massages abdominal organs to improve peristalsis and metabolic tone.
- Thoracic Expansion: Back extension expands anterior lung fields and strengthens diaphragm excursion.
Prone vs. Supine Yoga Poses: Structural Comparison
| Functional Marker | Prone Yoga Poses (Lying on Stomach) | Supine Yoga Poses (Lying on Back) |
|---|---|---|
| Sanskrit Classification | Vipareet Shayan Sthiti (Adho Mukha) | Supta Asanas (Urdhva Mukha) |
| Primary Spinal Action | Active spinal extension & posterior strengthening | Axial decompression, spinal flexion, passive twists |
| Target Musculature | Erector spinae, multifidus, gluteus maximus | Hamstrings, psoas release, abdominal wall, piriformis |
| Cardiovascular & Nervous Tone | Mild sympathetic stimulation, energizing warmth | Deep parasympathetic activation, restorative recovery |
| Key Benchmark Poses | Bhujangasana, Salabhasana, Dhanurasana | Savasana, Supta Padangusthasana, Setu Bandhasana |
Note: For an exhaustive breakdown of reclined floor postures, explore our dedicated guide to 15 restorative supine yoga poses.
10 Essential Yoga Poses Lying on Stomach (Step-by-Step)
1. Makarasana (Crocodile Pose)
- Sanskrit Etymology: Makara (Crocodile) + Asana (Posture)
- Anatomical Focus: Diaphragmatic respiratory mechanics, lumbar relaxation, sacral grounding.
- Level: Beginner / Restorative baseline.
Step-by-Step Alignment:
- Lie flat on your stomach with your legs extended hip-width apart.
- Turn your heels inward and let your big toes point outward to release tension across your gluteal muscles and sacroiliac joint.
- Fold your arms at the elbows, stacking opposite palms. Rest your forehead or cheek on your stacked hands.
- Close your eyes and direct your breath into your lower belly, feeling your abdomen press firmly into the floor on each inhalation.
- Hold for 3 to 5 minutes between active back extensions.
Common Alignment Error: Keeping legs glued together with clenched glutes. Allow feet to turn out naturally so the lower back releases fully.
2. Salamba Bhujangasana (Sphinx Pose)
- Sanskrit Etymology: Salamba (Supported) + Bhujanga (Serpent) + Asana
- Anatomical Focus: Thoracic spine extension, anterior neck opening, gentle lumbar decompression.
- Level: Beginner.
Step-by-Step Alignment:
- Lie prone with your legs parallel, tops of the feet pressing evenly into the mat.
- Place your elbows directly beneath your shoulders with forearms parallel and palms pressing downward.
- Inhale, ground your pubic bone firmly into the mat, and lift your chest away from the floor.
- Broaden your collarbones and draw your shoulder blades down your back without crunching your cervical vertebrae.
- Maintain gaze forward and hold for 1 to 2 minutes with smooth nasal breathing.
Common Alignment Error: Sinking into the shoulders and jutting the chin upward. Press active forearms down to create length through your neck.
3. Bhujangasana (Cobra Pose)
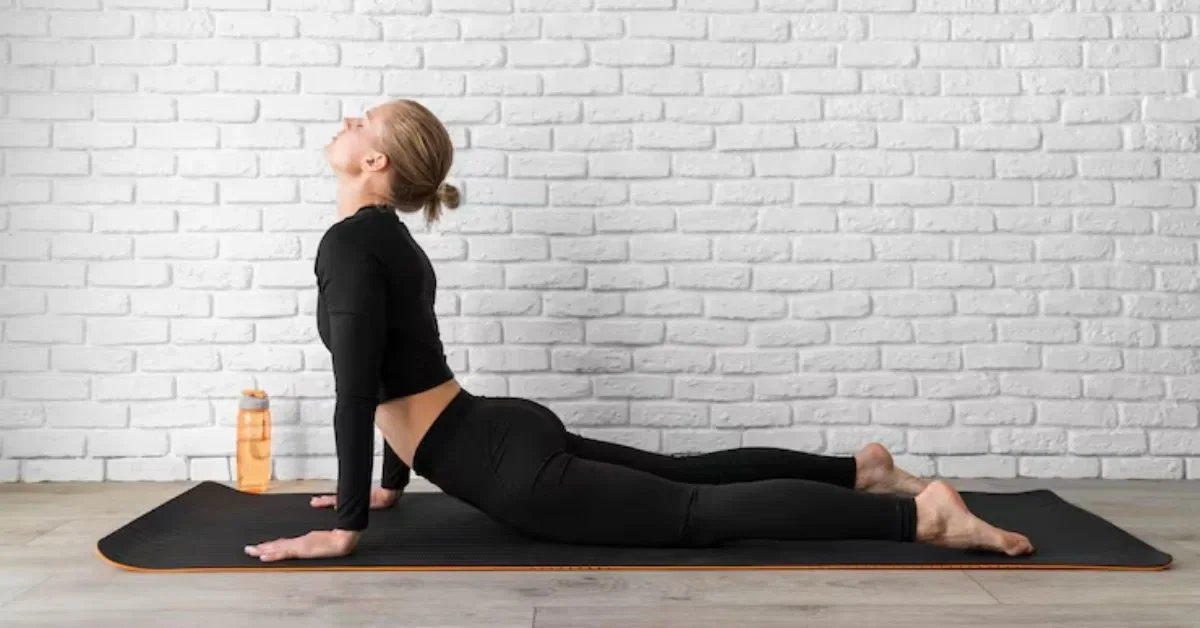
- Sanskrit Etymology: Bhujanga (Cobra/Serpent) + Asana
- Anatomical Focus: Latissimus dorsi, rhomboids, middle and lower trapezius, spinal flexibility.
- Level: Beginner to Intermediate.
Step-by-Step Alignment:
- Lie on your abdomen with forehead resting on the floor and feet hip-distance apart.
- Place your palms flat beside your lower ribs, keeping elbows hugged tightly into your rib cage.
- Press the tops of your feet and pubic bone into the mat to anchor your lower body.
- Inhale and lift your chest off the mat using your back muscles first, keeping minimal weight in your palms.
- Draw your chest forward and upward, keeping a soft micro-bend in both elbows. Hold for 5 to 8 steady breaths.
Contraindications: Acute lumbar disc herniation, carpal tunnel syndrome, pregnancy beyond the first trimester.
4. Ardha Salabhasana (Half Locust Pose)
- Sanskrit Etymology: Ardha (Half) + Salabha (Locust) + Asana
- Anatomical Focus: Unilateral gluteal isolation, lower back stability, hamstring engagement.
- Level: Beginner.
Step-by-Step Alignment:
- Rest prone with your chin grounded on the mat and arms alongside your torso, palms facing down.
- Keep your pelvic bones level. Inhale and engage your right glute to lift your right leg straight back and up.
- Avoid rotating your right hip open; keep both hip points grounded evenly on the floor.
- Reach through the right toes while lengthening the spine through the crown of your head.
- Hold for 5 breaths, lower with control on an exhalation, and repeat on the left side.
Therapeutic Benefit: Excellent rehabilitation pose for mild sacroiliac joint imbalance and sedentary hamstring weakness.
5. Salabhasana (Full Locust Pose)
- Sanskrit Etymology: Salabha (Locust/Grasshopper) + Asana
- Anatomical Focus: Full posterior kinetic chain (erector spinae, gluteus maximus, hamstrings, posterior deltoids).
- Level: Intermediate.
Step-by-Step Alignment:
- Begin lying flat on your stomach with arms resting beside your hips, palms facing up.
- Exhale completely, then on a deep inhalation, lift your head, chest, arms, and straight legs simultaneously off the floor.
- Reach your knuckles back toward your heels to broaden across your upper chest.
- Keep the back of your neck long by gazing slightly forward toward the top edge of your mat.
- Balance your weight on your lower abdomen and pelvis for 5 breaths. Release slowly on an exhale.
Common Alignment Error: Bending the knees to fake elevation. Keep knees fully straight and lift from the hip joint and gluteal contraction.
6. Dhanurasana (Bow Pose)
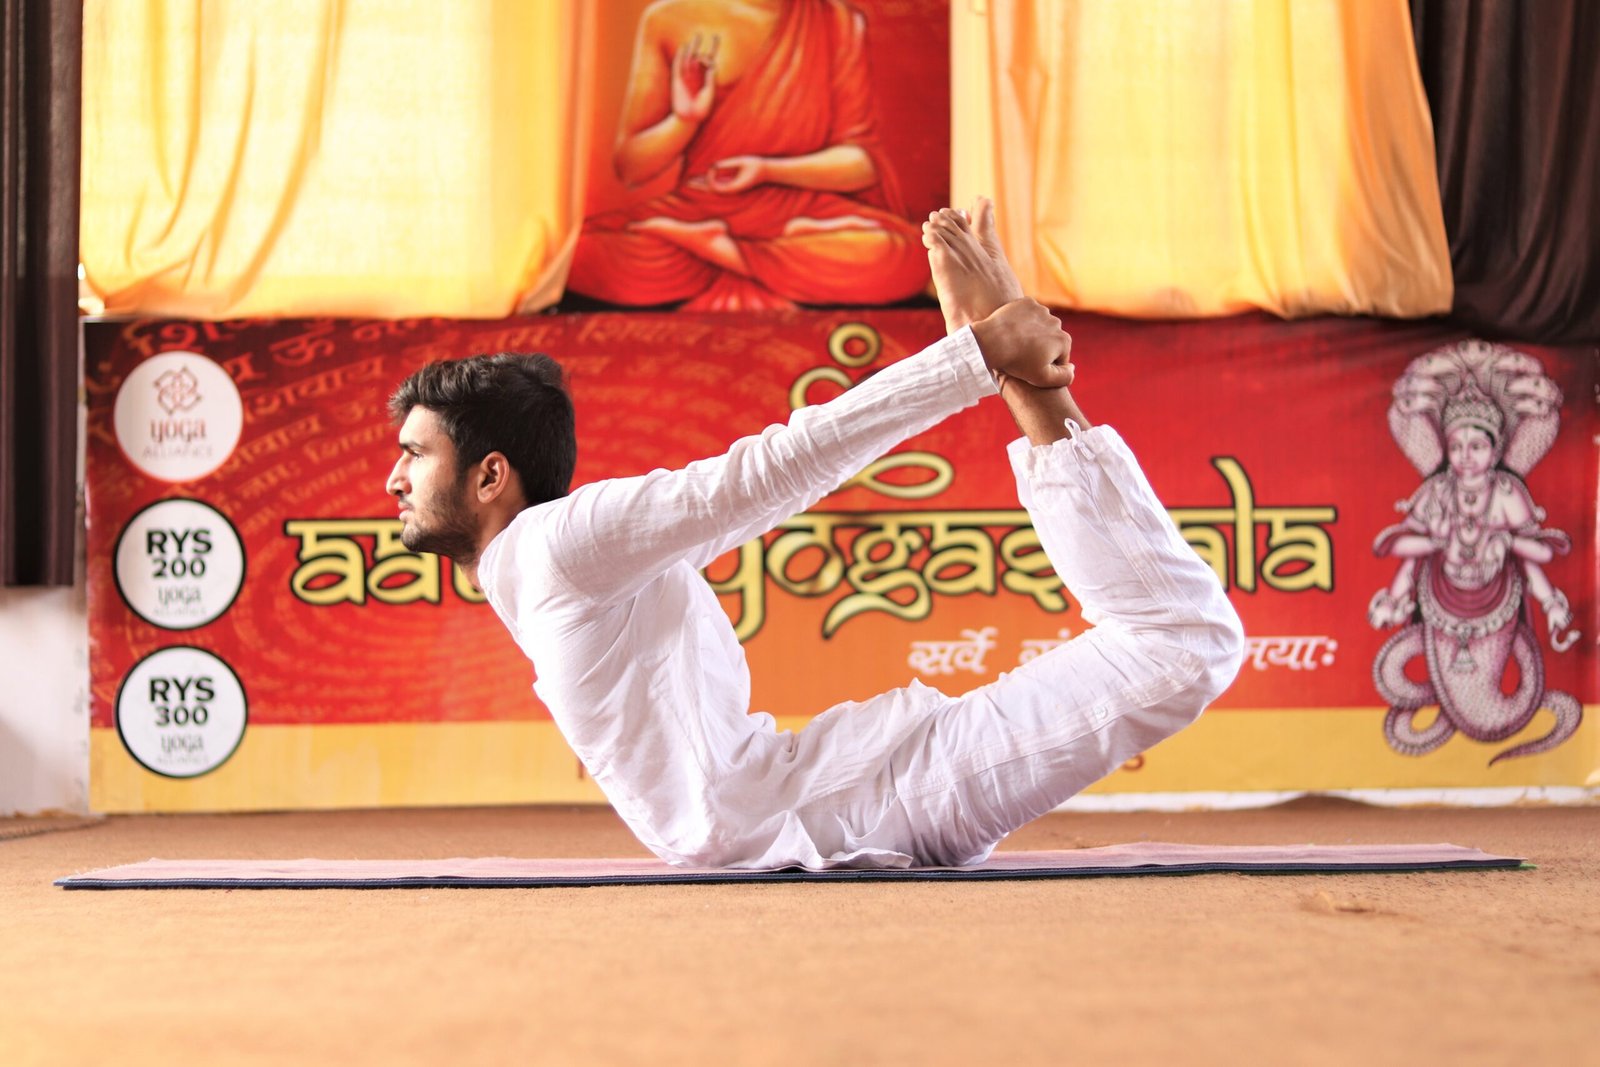
- Sanskrit Etymology: Dhanu (Bow) + Asana
- Anatomical Focus: Anterior body myofascial stretch, quadriceps, pectoralis major, intercostal expansion.
- Level: Intermediate.
Step-by-Step Alignment:
- Lie prone with feet hip-width apart. Bend both knees and draw your heels toward your glutes.
- Reach your hands back and clasp the outer edges of your ankles firmly.
- Inhale deeply, kick your shin bones back away from your body, and allow that kicking action to lift your chest and thighs off the floor.
- Keep your knees aligned with your hips rather than splaying them wide outward.
- Maintain steady abdominal breathing for 20 to 30 seconds. Release slowly on an exhalation.
Contraindications: High blood pressure, abdominal hernia, peptic ulcers, lumbar spondylolisthesis.
7. Ardha Bhekasana (Half Frog Pose)
- Sanskrit Etymology: Ardha (Half) + Bheka (Frog) + Asana
- Anatomical Focus: Rectus femoris, iliopsoas, deep hip flexors, shoulder rotation.
- Level: Intermediate.
Step-by-Step Alignment:
- Prop your torso up onto your left forearm in Sphinx alignment, angled slightly across your mat.
- Bend your right knee and reach your right hand back to cup the top of your right foot.
- Gently press the heel of your right hand downward to draw your right heel toward your outer right hip.
- Keep your chest facing forward and both hip points squared to the mat.
- Hold the stretch for 30 to 45 seconds, breathing into the front of the right thigh, then switch sides.
Therapeutic Benefit: Directly counteracts deep psoas shortening caused by prolonged seated work.
8. Urdhva Mukha Svanasana (Upward-Facing Dog)
- Sanskrit Etymology: Urdhva (Upward) + Mukha (Facing) + Svana (Dog) + Asana
- Anatomical Focus: Triceps brachii, anterior deltoids, wrist extensors, complete spinal arch.
- Level: Intermediate to Advanced.
Step-by-Step Alignment:
- Lie prone with feet hip-width apart, tops of the feet flat on the floor.
- Position your hands beside your lower ribs with fingers spread wide.
- Inhale, press firmly through your palms and the tops of your feet, and straighten your arms completely.
- Lift your entire torso, hips, and thighs off the floor so only your hands and the tops of your feet support your weight.
- Roll your shoulders back and broaden your sternum forward. Hold for 3 to 5 breaths before transitioning to Downward Dog.
Contraindications: Recent wrist injury, carpal tunnel syndrome, third-trimester pregnancy.
9. Chaturanga Dandasana (Four-Limbed Staff Pose)
- Sanskrit Etymology: Chatur (Four) + Anga (Limbs) + Danda (Staff) + Asana
- Anatomical Focus: Serratus anterior, transversus abdominis, pectoralis major, scapular stability.
- Level: Intermediate.
Step-by-Step Alignment:
- Start in high plank position with shoulders stacked directly above wrists and core braced.
- Shift your weight forward onto your tiptoes so your shoulders move slightly ahead of your wrists.
- Exhale and lower your body in a straight staff-like line until your elbows form an exact 90-degree angle.
- Hug your elbows firmly into your rib cage; do not allow your shoulders to dip below your elbow line.
- Keep your neck neutral and hold for 1 to 3 breaths before lowering prone or moving into Upward Dog.
Common Alignment Error: Sagging the lumbar spine toward the floor. Maintain a strong posterior pelvic tilt and active abdominal brace throughout.
10. Balasana (Child’s Pose – Prone Counterpose)
- Sanskrit Etymology: Bala (Child) + Asana
- Anatomical Focus: Lumbar flexion, sacral decompression, spinal extensor muscle recovery.
- Level: All Levels / Restorative counterpose.
Step-by-Step Alignment:
- From any prone backbend, press into your palms and shift your hips back toward your heels.
- Separate your knees wide to the outer edges of your mat, bringing big toes together to touch.
- Fold your torso forward between your thighs, resting your forehead onto the floor.
- Extend your arms out long in front of you, or drape them back alongside your calves with palms facing up.
- Hold for 1 to 3 minutes to allow your lumbar vertebrae to decompress and neutralize after backbends.
Therapeutic Sequencing Guide: Building a Safe Prone Routine
Prone asanas should be practiced in a progressive order of spinal extension intensity. Never jump directly into deep backbends like Bow Pose without priming your thoracic spine and hip flexors.

Foundational Sequencing Flow:
- Warm-Up: Cat-Cow (Marjaryasana-Bitilasana) – 10 smooth breath cycles
- Prone Calibration: Makarasana (Crocodile Pose) – 2 minutes of belly breathing
- Gentle Extension: Salamba Bhujangasana (Sphinx Pose) – 1 minute hold
- Active Back Extension: Bhujangasana (Cobra Pose) – 3 rounds of 5 steady breaths
- Unilateral Strengthening: Ardha Salabhasana – 5 breaths per leg
- Bilateral Chain Engagement: Salabhasana (Full Locust) – 3 rounds of 5 breaths
- Deep Front Body Opening: Dhanurasana (Bow Pose) – 2 rounds of 20 seconds
- Neutralizing Counterpose: Balasana (Child’s Pose) – 3 minutes of passive recovery
For a comprehensive sequence template incorporating both floor and standing postures, review our gentle Hatha yoga sequences or learn how yoga supports spinal health.
Master Traditional Yogic Alignment in Rishikesh
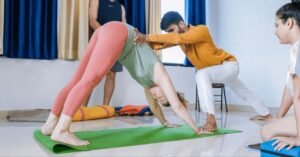
Self-practicing backbends without professional anatomical adjustment often leads to lumbar compression and sacroiliac strain. In our certified courses at Aatm Yogashala, master instructors teach hands-on adjustments, biomechanical alignment, and therapeutic modifications tailored to every spinal structure.
Whether you are preparing to teach globally or deepening your personal practice along the banks of the sacred Ganges:
- Enroll in our certified 200-hour yoga teacher training in Rishikesh.
- Compare full curriculums and accreditation standards: Download Syllabus & View All Course Comparison Details on Home Page.
Frequently Asked Questions
What are yoga poses lying on stomach called in Sanskrit?
Postures performed lying flat on your stomach are termed Vipareet Shayan Sthiti or Adho Mukha prone asanas in traditional Hatha yoga. Famous examples include Bhujangasana (Cobra Pose), Salabhasana (Locust Pose), and Makarasana (Crocodile Pose).
Which yoga pose lying on stomach is best for lower back pain?
For non-acute lower back stiffness caused by prolonged sitting, Sphinx Pose (Salamba Bhujangasana) and Half Locust Pose (Ardha Salabhasana) are the most effective. They strengthen the deep multifidus and erector spinae muscles while stabilizing the pelvis without hyper-extending the lumbar spine.
Who should avoid prone yoga poses?
Prone yoga postures are contraindicated for individuals with active abdominal hernias, recent abdominal surgery, severe lumbar spondylolisthesis, peptic ulcers, and pregnant practitioners past the first trimester. Practitioners with acute spinal disc herniation should consult a physician before attempting prone backbends.
How do prone yoga poses differ from supine yoga poses?
Prone poses focus on spinal extension, back chain strengthening, and anterior body lengthening. Supine poses (performed lying on the back) focus on axial spinal decompression, hamstring flexibility, and parasympathetic relaxation.

Comments
I’m a beginner yoga practitioner and this article made me feel confident to try these poses at home. Clear instructions are well described—thank you for sharing.
Great content! Salabhasana has really helped a lot to improve my posture. It would be helpful if you could also share a short video demo in the future.